

If you find setting up your LED video wall challenging, your viewing experience may be less than you hoped for. This guide will touch on every aspect of what you should know about setting up your LED video wall. It will go over selecting the right hardware and configuring the built-in software. Finally, it will cover what routine maintenance you need to perform to keep it in good condition.
1. How To Prepare Before Setting Up Your LED Video Wall
2. Ways To Prepare Your LED Video System
3. How To Install the LED Video Wall Frame
4. A Quick Installation Guide for LED Tiles
5. Tips For Testing Your LED Video Wall Controllers
6. How To Test the LED Video Wall Tiles Display
7. Choose LEDSINO As Your LED Video Wall Provider
1. How To Prepare Before Setting Up Your LED Video Wall
Prior to your LED video wall installation, you should take time to develop a layout plan. This design should take the video wall’s dimensions into account, along with its placement, and infrastructure. A well-thought-out strategy will provide you with less hassle during installation to fully enjoy your LED video wall.
Once you have settled on your desired layout of the space and your LED video wall, you can begin setting it up. When setting up your LED video wall, you should consider these factors:
● Consider the Video Wall’s Size:
During the installation, you should consider factors including the height, width, and aspect ratio of the wall. By considering this final element, you’ll be able to guarantee that everything is in scale.
● Choose the Location:
When choosing the location for your LED video wall, consider aspects such as visibility, accessibility, and any obstructions that may be in the way. Where you place the wall can impact its visual effectiveness.
● Check The Supporting Structure:
The supporting structure underneath the LED video wall should be sturdy enough to handle weight and visually appealing. The framework should support the tiles’ dimensions, the video wall’s weight, and any other facets of your design.
● Make a wiring diagram:
It can determine where controllers and power sources are and how they connect with your video wall. Ensure that your framework can support a wired connection without any issues when designing your video wall setup.
● Conduct a Site Survey:
Conduct a site survey before installing your video wall. A site survey checks whether the location and infrastructure supporting the video wall are adequate to be considered stable. If there are any problems, a site survey can be used to find them so you can fix them before installation.
2. Ways To Prepare Your LED Video System
An important step is taking time to ensure the installation site is properly set up. This will improve the odds that your installation goes smoothly and without incident. When setting up your LED video wall, you should double-check its location in relation to its viewers.
Depending on the brightness of the LED video wall, it’s important to consider how its location impacts your viewer’s experience. Your chosen spot should be seen from where the viewers are sitting and be convenient for everyone. While checking the location, you should also check for any visual obstructions that may block its viewing range.
In addition to considering its location, the supporting surface for your video wall should be debris-free and dry. Any uneven surface present can cause issues later if not taken care of beforehand, as it can affect its ability to hold the video wall’s frame and LED tiles. If the surface is uneven, install a suitable leveling compound before installing the video wall frame.
3. How To Install the LED Video Wall Frame
A robust frame that can hold the video wall in place is an important part of ensuring you can install the video wall frame easily. As you begin mounting the video wall frame, you’ll need to take the following tips into account throughout the process:
● Measuring and Marking the Wall:
Once you’ve completely set up the location, it’s necessary to measure and mark the wall to ensure you understand the parameters you are working with. This step ensures that your LED video wall is perfectly level and even.
● Assembling the Frame:
Assemble the frame before mounting it to the wall. Some manufacturers may provide pre-assembled frame pieces with your device, easing the process. It’s important to ensure that every component is lined up with tight screws and bolts before you mount the frame to the wall.
● Mounting the Frame:
Once the frame is assembled, it’s time to connect it to your wall using anchors and screws. Take care to determine that the frame is level and tight against the wall before finalizing the installation and testing it for stability.
● Installing Crossbars and Brackets:
Once the frame is attached to the wall, you can install any crossbars and brackets needed to support the LED control system. Depending on the size and weight of the LED video wall, these crossbars and brackets may need to be adjusted and installed throughout the testing process to ensure that they can support the LED tiles.
● Testing the Frame:
Following installation, it’s a good idea to check the frame for stability and its ability to bear a load. You can test the frame by placing weighted items on it, and if it’s unstable, reinforce it with crossbars and brackets so it can hold the LED tiles effectively.
4. A Quick Installation Guide for LED Tiles
After installing the framework, you can begin installing the LED tiles. The LED tiles are the visual aspect of your LED video wall and are considered the most essential part of the process. When installing the tiles, it’s important to take care and consideration as any loose tiles or mismatched modules can affect the device itself. To install the LED tiles correctly, make sure to follow these steps for proper installation:
● Double-Check Your Workspace:
Before installing the tiles, make sure your workspace is clean, clutter-free, and has adequate lighting. It should also be clear of all items that could impact your ability to test the tiles, and you should have all the tools and equipment necessary to complete the task.
● Assemble the Tiles:
Each tile of your LED screen is a separate module that’s part of a larger display. Carefully follow the step-by-step instructions provided by the manufacturer during the assembly of the tiles. Afterward, be certain to check for loose tiles and secure them in place properly if you find them.
● Mount The Tiles To The Frame:
Following the assembly of the tiles, the LED tiles should be secured to the frame. Its installation will depend on the solid and level of the frame, so ensure you follow the manufacturer’s instructions when attaching the tiles.
● Connect All Power and Signal Cables:
After you’ve secured the tiles to the frame, carefully connect all the necessary power and signal wires to them. Have a reliable power source ready to route and secure any wires, signal cables, and other cords needed to test your tiles.
● Test Your LED Tiles:
Follow the tile installation, the controller can be used to test for issues with the display. Look for irregularities in the display patterns, which may be identified as poor color presentation and dead pixels. If the display has problems, consult your LED video wall manual and contact the manufacturer to troubleshoot.

5. Tips For Testing Your LED Video Wall Controllers
Your LED video wall depends on the controller to work, as the controller helps power the screen and decide how visuals are displayed. The LED tiles help display all information fed into the controller. The controller receives this information from any software device that holds your video information, such as a computer or media player.
When installing your LED tiles, check if they work as expected before connecting them to the LED video wall controller. It’s recommended to test the tiles one by one for dead pixels and faded colors, and if all tiles work properly, you can set up the tiles display to your format of choice.
If you’re ready to connect the controller to the LED tiles, you should position it in an area easily accessible for maintenance. Place the LED display controller close to the screen to cut down on wire length and establish an easy connection.
Once you’ve connected the tiles to the controller, you should check for signs of poor signal or malfunctioning display. If these problems occur, you can check for loose cables, kinks in the cables, and wire breaks. While sending test signals to the tiles, any problems with the display should be narrowed down to either the cables, the tiles, or the power source, and check for software issues before contacting your manufacturer for troubleshooting.
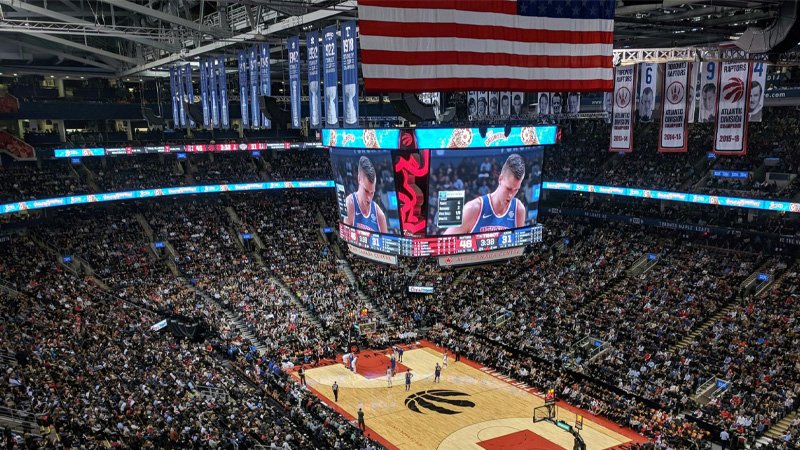
6. How To Test the LED Video Wall Tiles Display
When testing the tiles’ visual qualities, use various resolutions and aspect ratios with various content before confirming that your LED video wall works. As a huge investment, your LED video wall should be able to display photos, videos, and text without any problems with the display quality. You should also test the tiles from any source, such as computers, DVD players, and CD players so that all connectivity issues can be rooted out.
If you’ve put the time and effort into testing your LED video wall, you can be certain that your money’s well spent, and you’ll have years of excellent visuals for your content.
7. Choose LEDSINO As Your LED Video Wall Provider
LED video walls should bring out the best of your content and at LEDSINO, we can provide products that offer large resolutions and greater visibility to your audience. Whether you’re planning an event or want to experience the luxury of LED video walls, our company can provide you with technology developed with the highest specifications and make your purchase worthwhile.
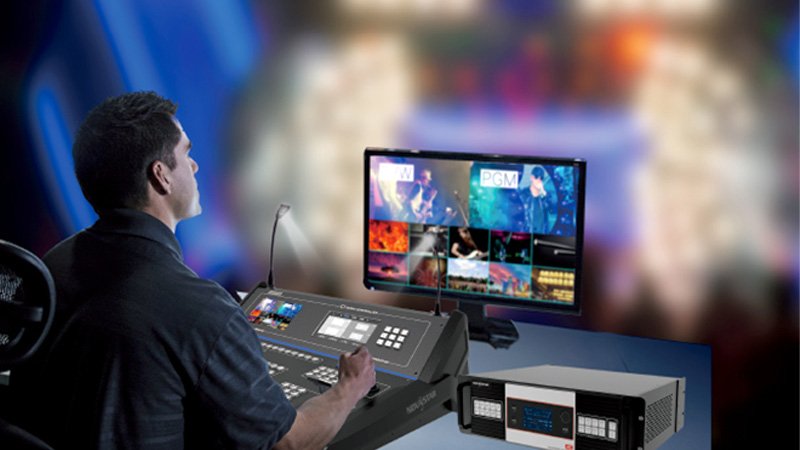
That makes this a great opportunity to contact our team about great video wall controllers like our Colorlight CS-Series Video Media Server. This advanced media processing system is perfect for the most demand multimedia concerns. Designed to accept a full range of input sources while handling the latest resolutions and video formats, it’ll never let you down.
With the help of our team, we can seamlessly integrate this unit to display outstanding visual content on your existing LED Displays. For more information, call us today to speak with our consultants about our selection of LED control systems.

